

The admin settings screens
The AI Tools, Access Control and Branding & Appearance admin tabs.
The Admin group in the settings tabs configures the whole site. This page shows three of its tabs. The others are Licensing, Allowed Domains, WordPress Email, Diagnostics, Mail sync and Data and uninstall. Site access and administration covers all of them.
AI Tools
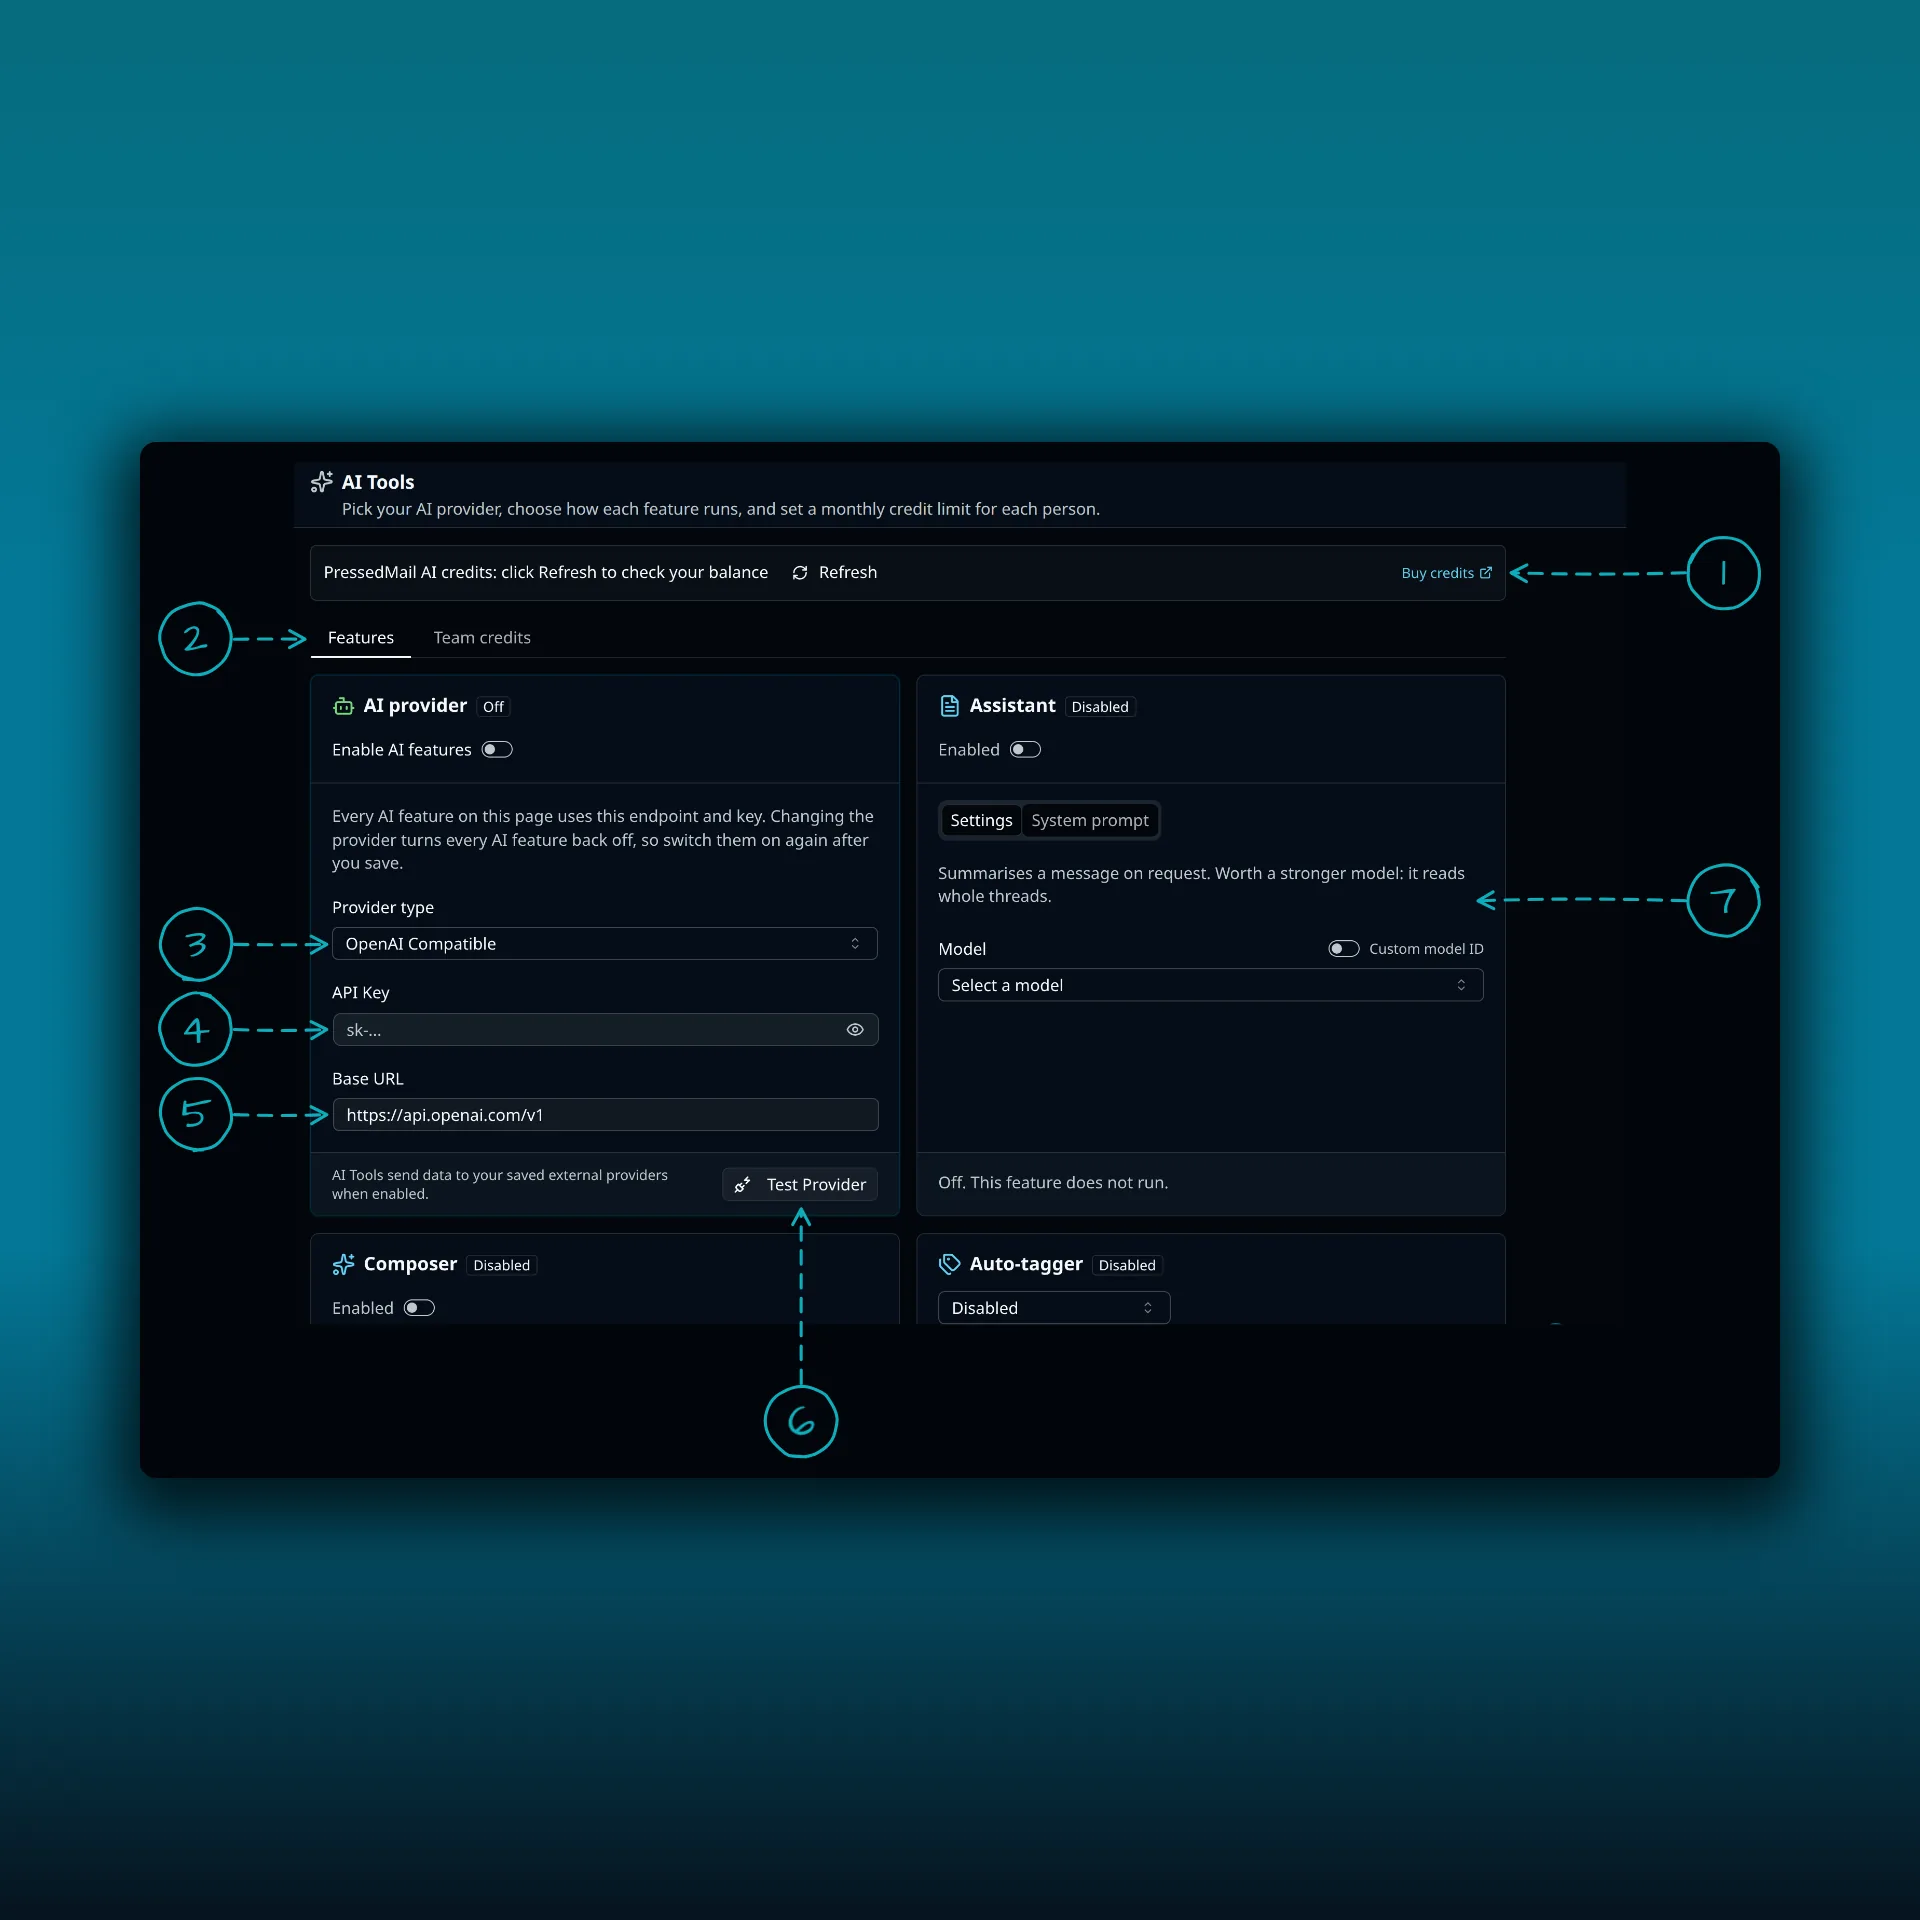
- The credits bar. Refresh checks your PressedMail AI balance. Buy credits links to where you get more.
- Features and Team credits.
- Provider type. OpenAI Compatible here.
- API Key.
- Base URL.
- Test Provider.
- A feature card. Assistant, Composer and Auto-tagger each have their own card. Settings and System prompt tabs and a model picker sit inside.
Every AI feature on the page uses the one endpoint and key above. Changing the provider turns every AI feature back off, so switch them on again after you save.
PressedMail AI and Set up and use AI explain the features.
Access Control
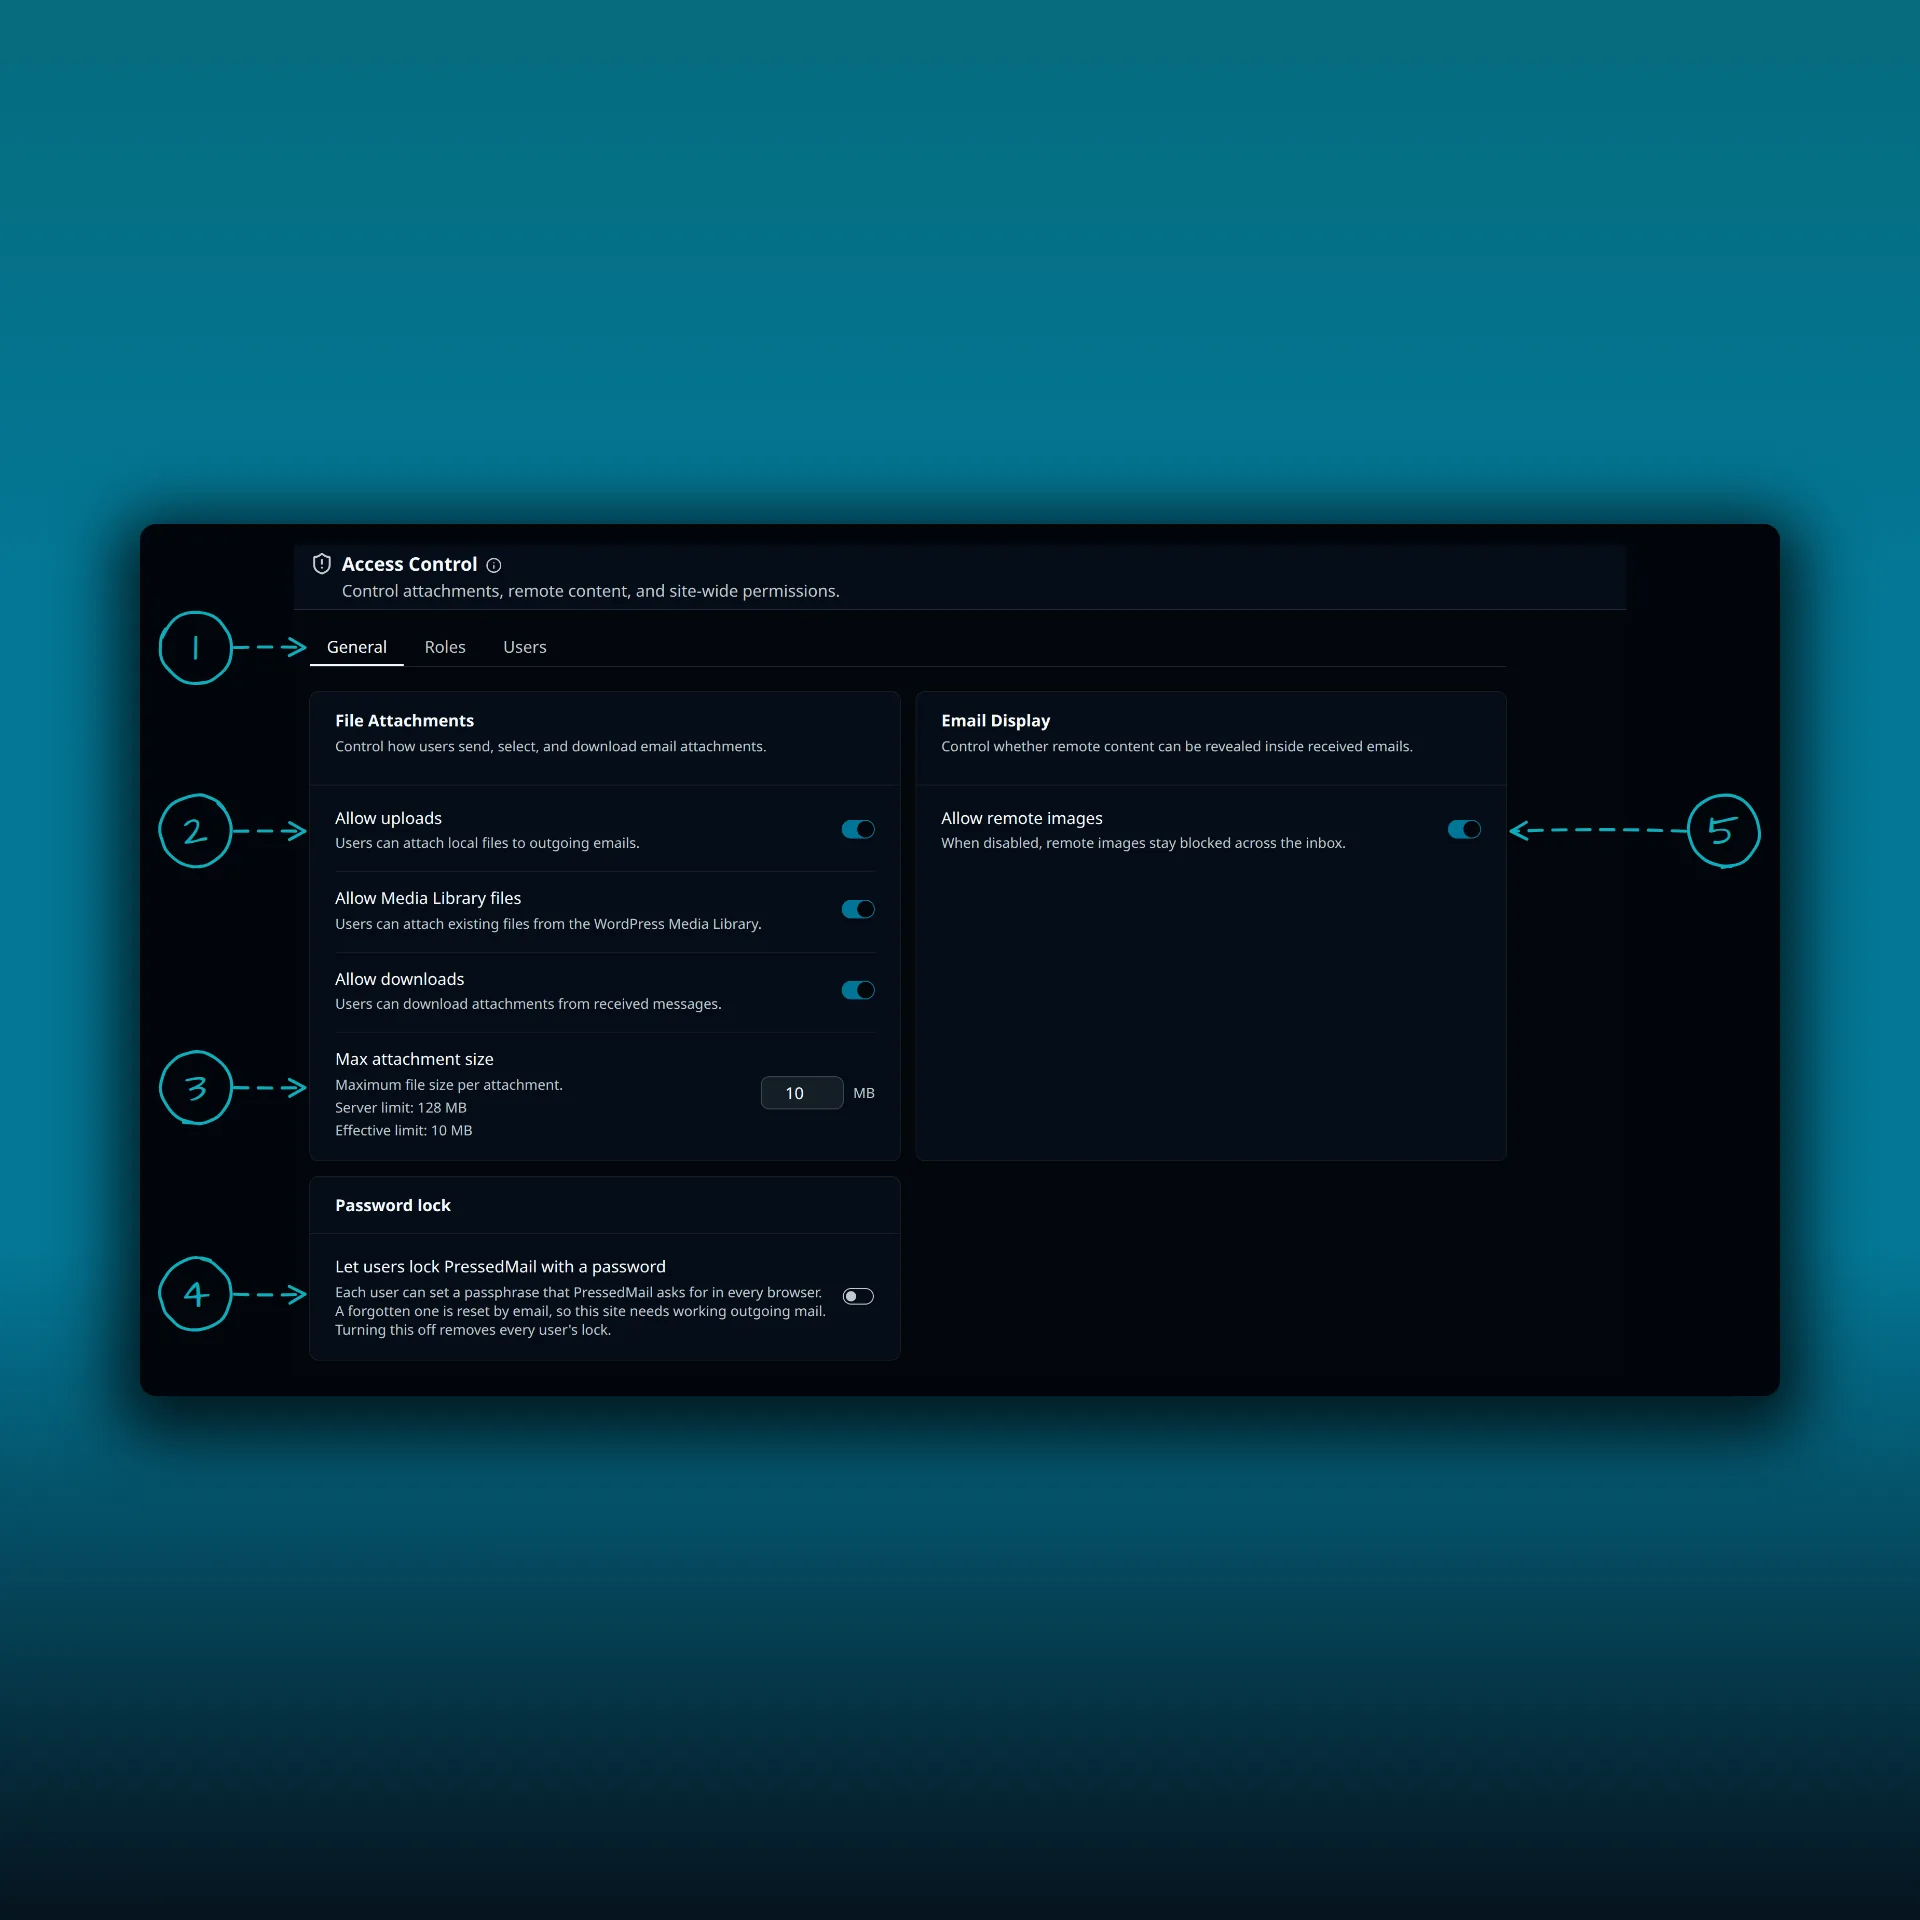
- General, Roles and Users.
- Allow uploads, Allow Media Library files and Allow downloads. Each is a switch.
- Max attachment size. The page shows the server limit and the effective limit.
- Password lock. It lets each person lock PressedMail with a passphrase. A forgotten passphrase is reset by email, so the site needs working outgoing mail.
- Allow remote images. When it is off, remote images stay blocked across the inbox.
Branding & Appearance
This tab belongs to Ultimate.
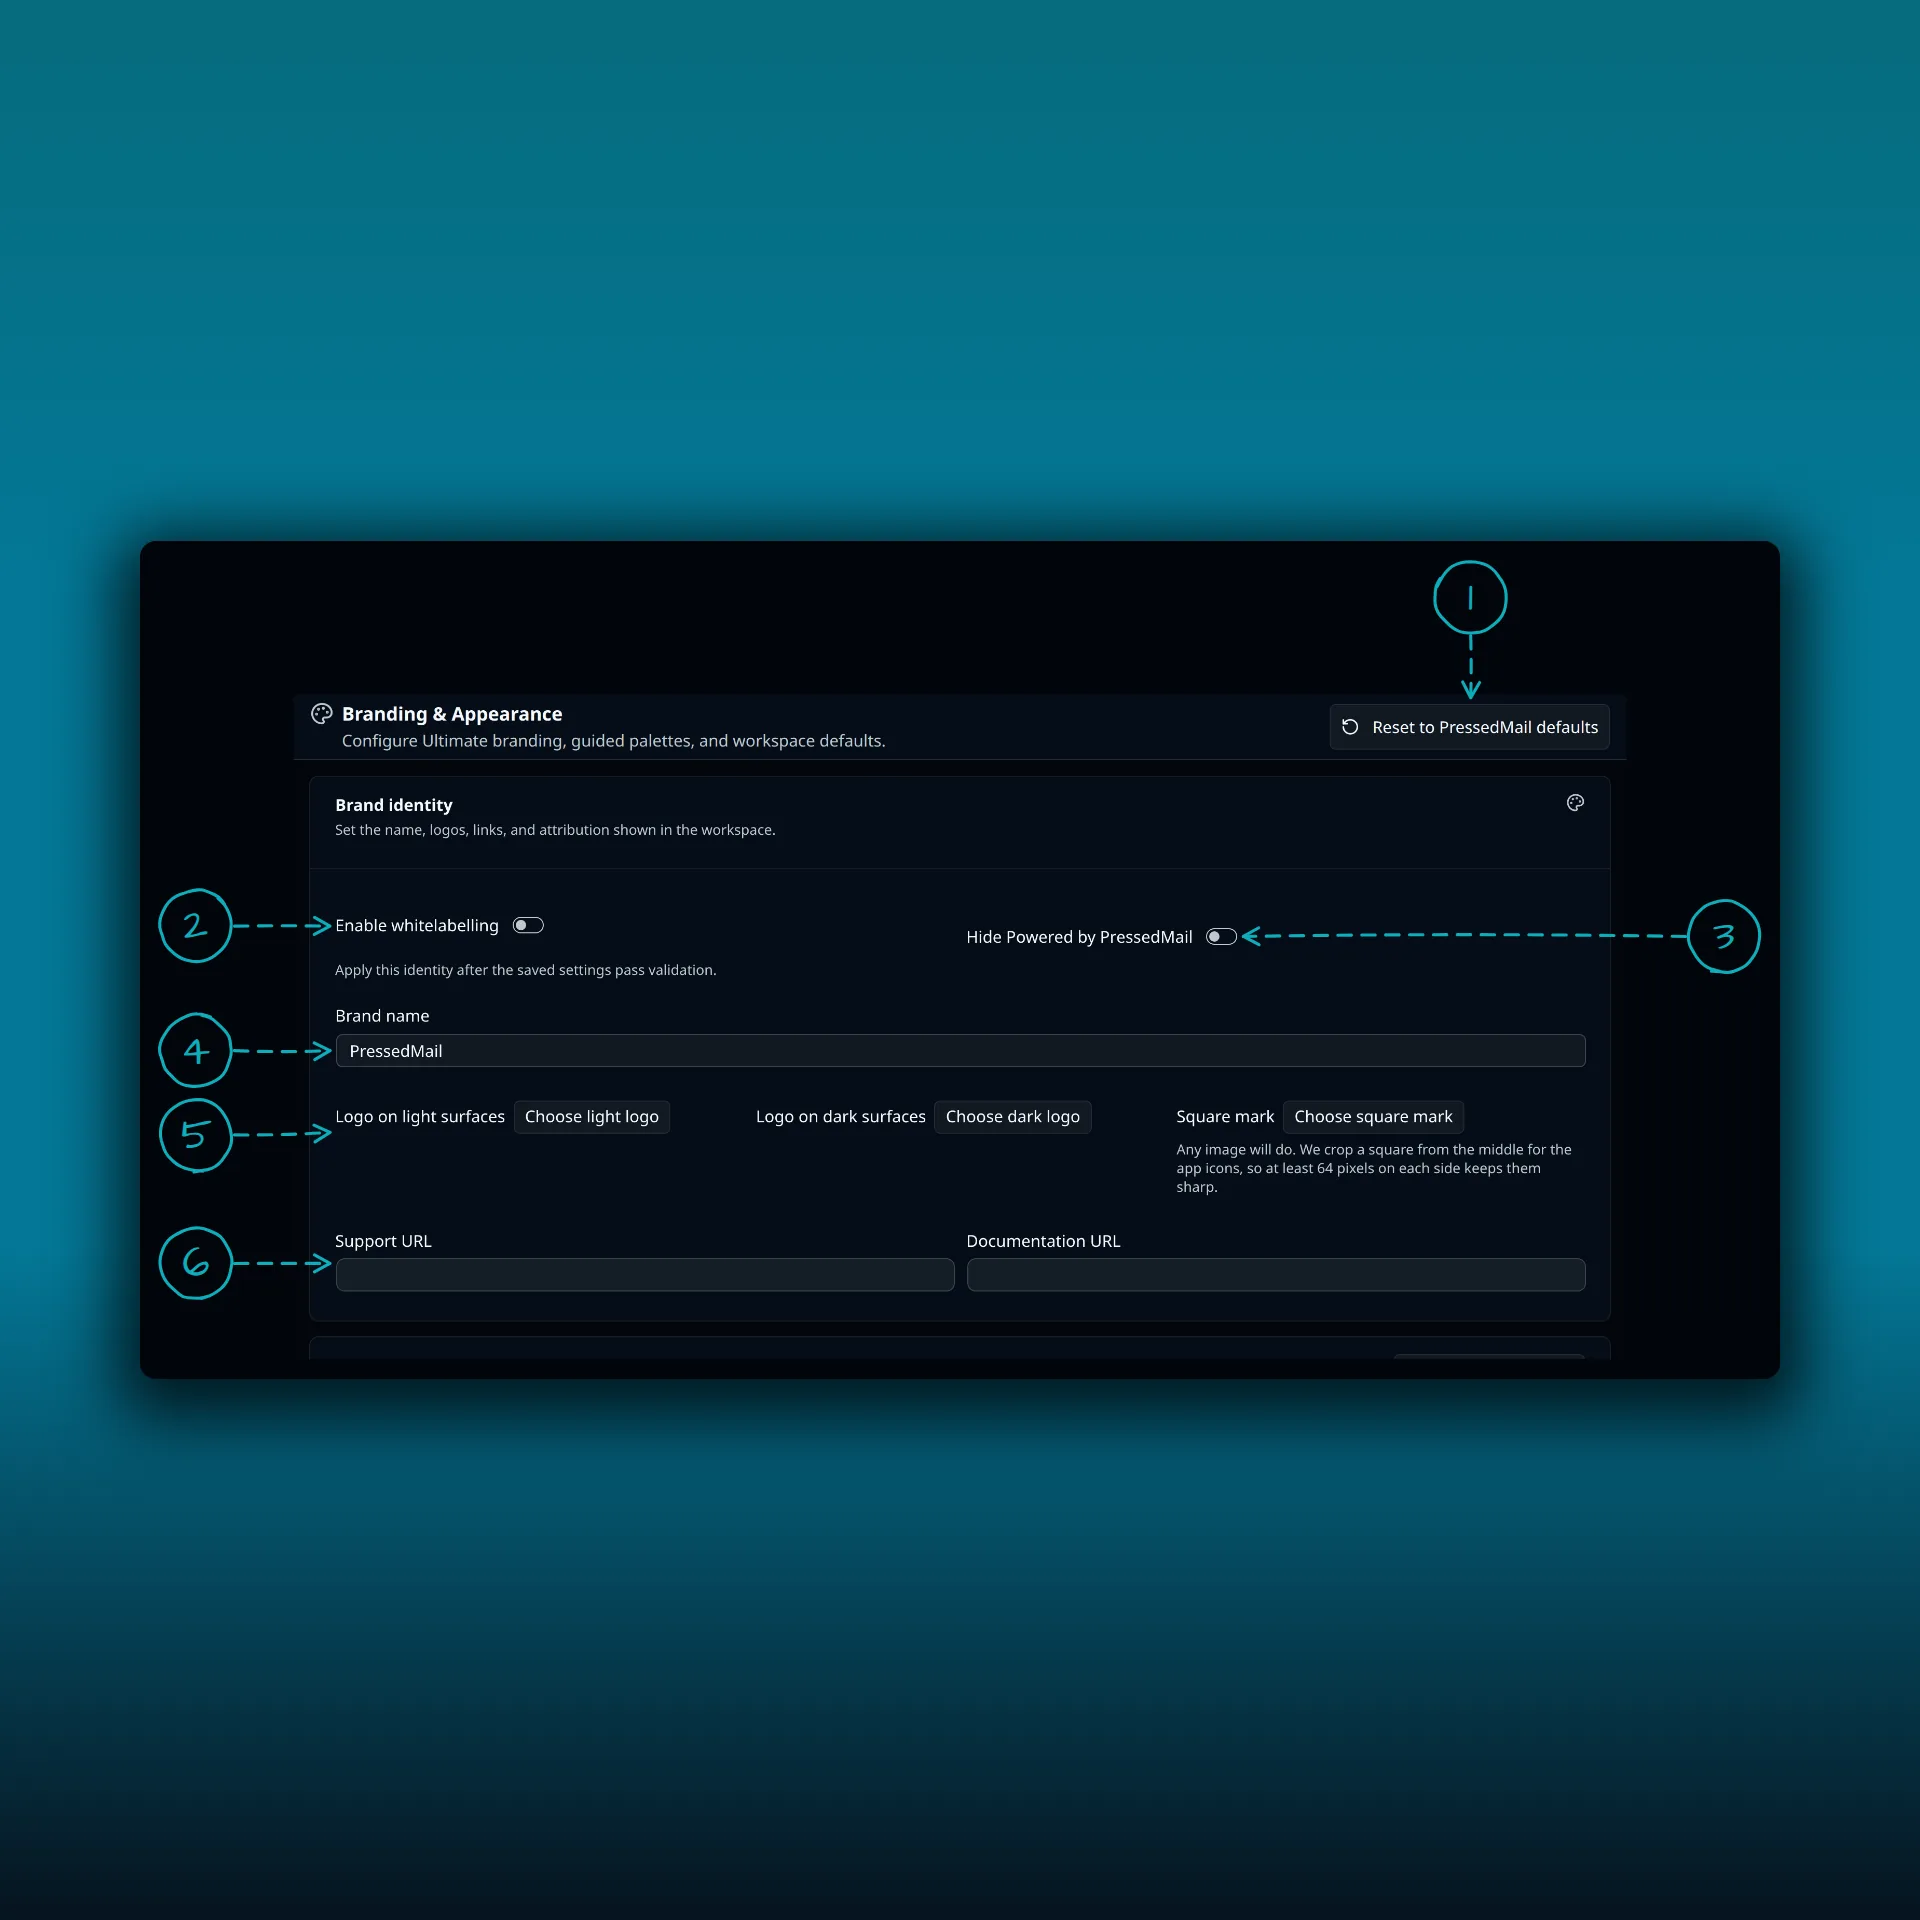
- Reset to PressedMail defaults.
- Enable whitelabelling.
- Hide Powered by PressedMail.
- Brand name.
- The logos: Choose light logo, Choose dark logo and Choose square mark. Any image will do for the square mark. It is cropped from the middle, so at least 64 pixels on each side keeps it sharp.
- Support URL and Documentation URL.
Below these sit a guided palette and a scoped preview. White labeling walks through the whole tab.