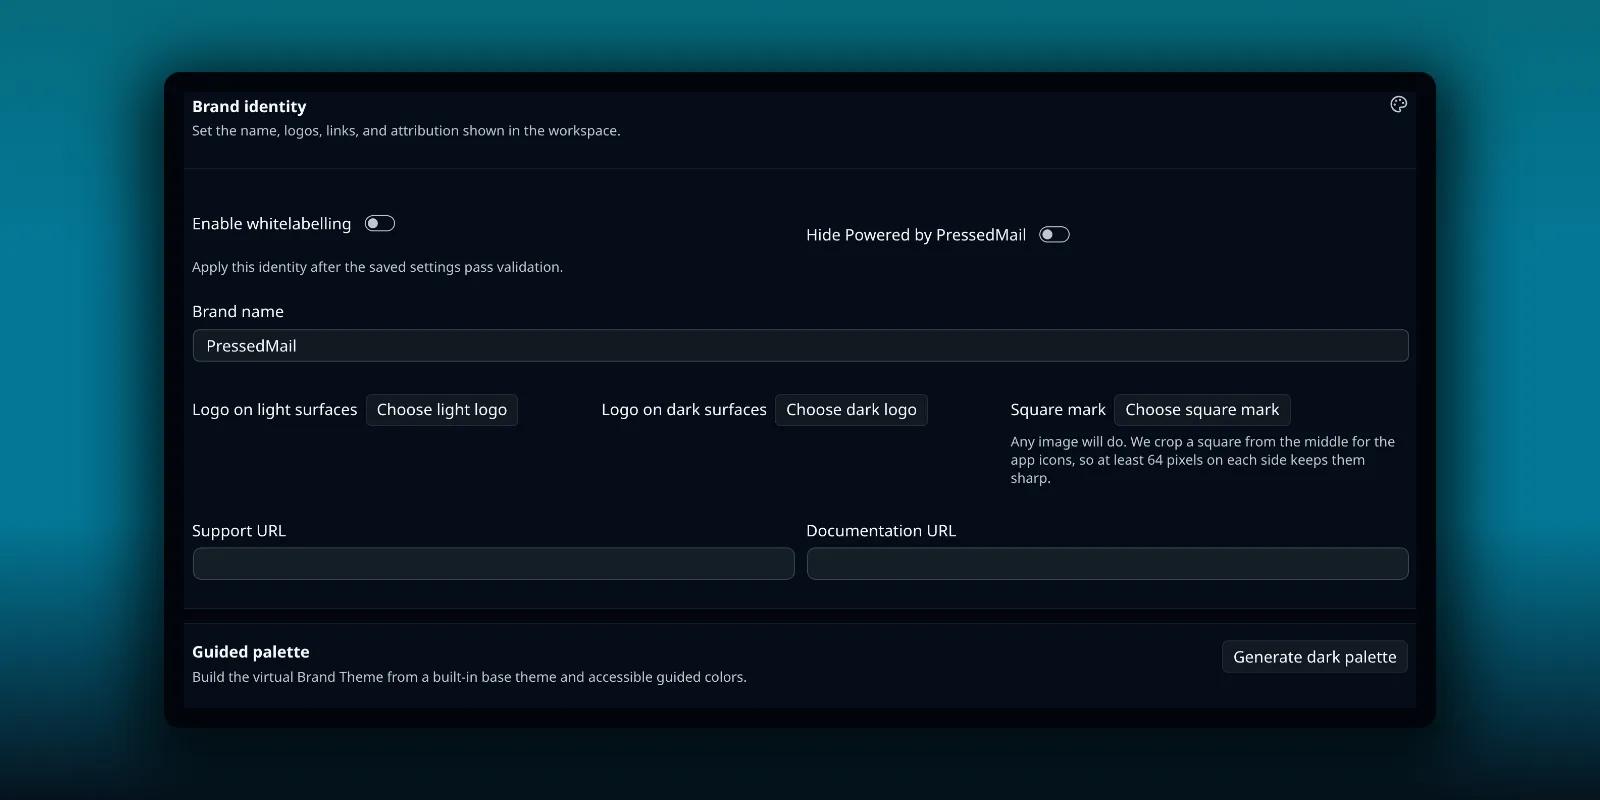
If you build WordPress sites for clients, you may want their mailbox to look like theirs. White labelling lets you replace the PressedMail name, the logos, the colors and the default appearance for everyone who uses PressedMail on that site. It is a setting for the whole site, not for each person.
White labelling needs a licence with the Ultimate entitlement, which means the Ultimate and Lifetime plans. The free plugin does not include it. On a paid site without Ultimate, the settings tab does not appear.
Where the settings are
Open Settings and choose Branding and Appearance in the Admin group. You need the WordPress manage options capability as well as the licence. All of it is one saved object, so a save either applies in full or comes back with the fields that failed.
Set the identity
The top half of the tab is the brand identity.
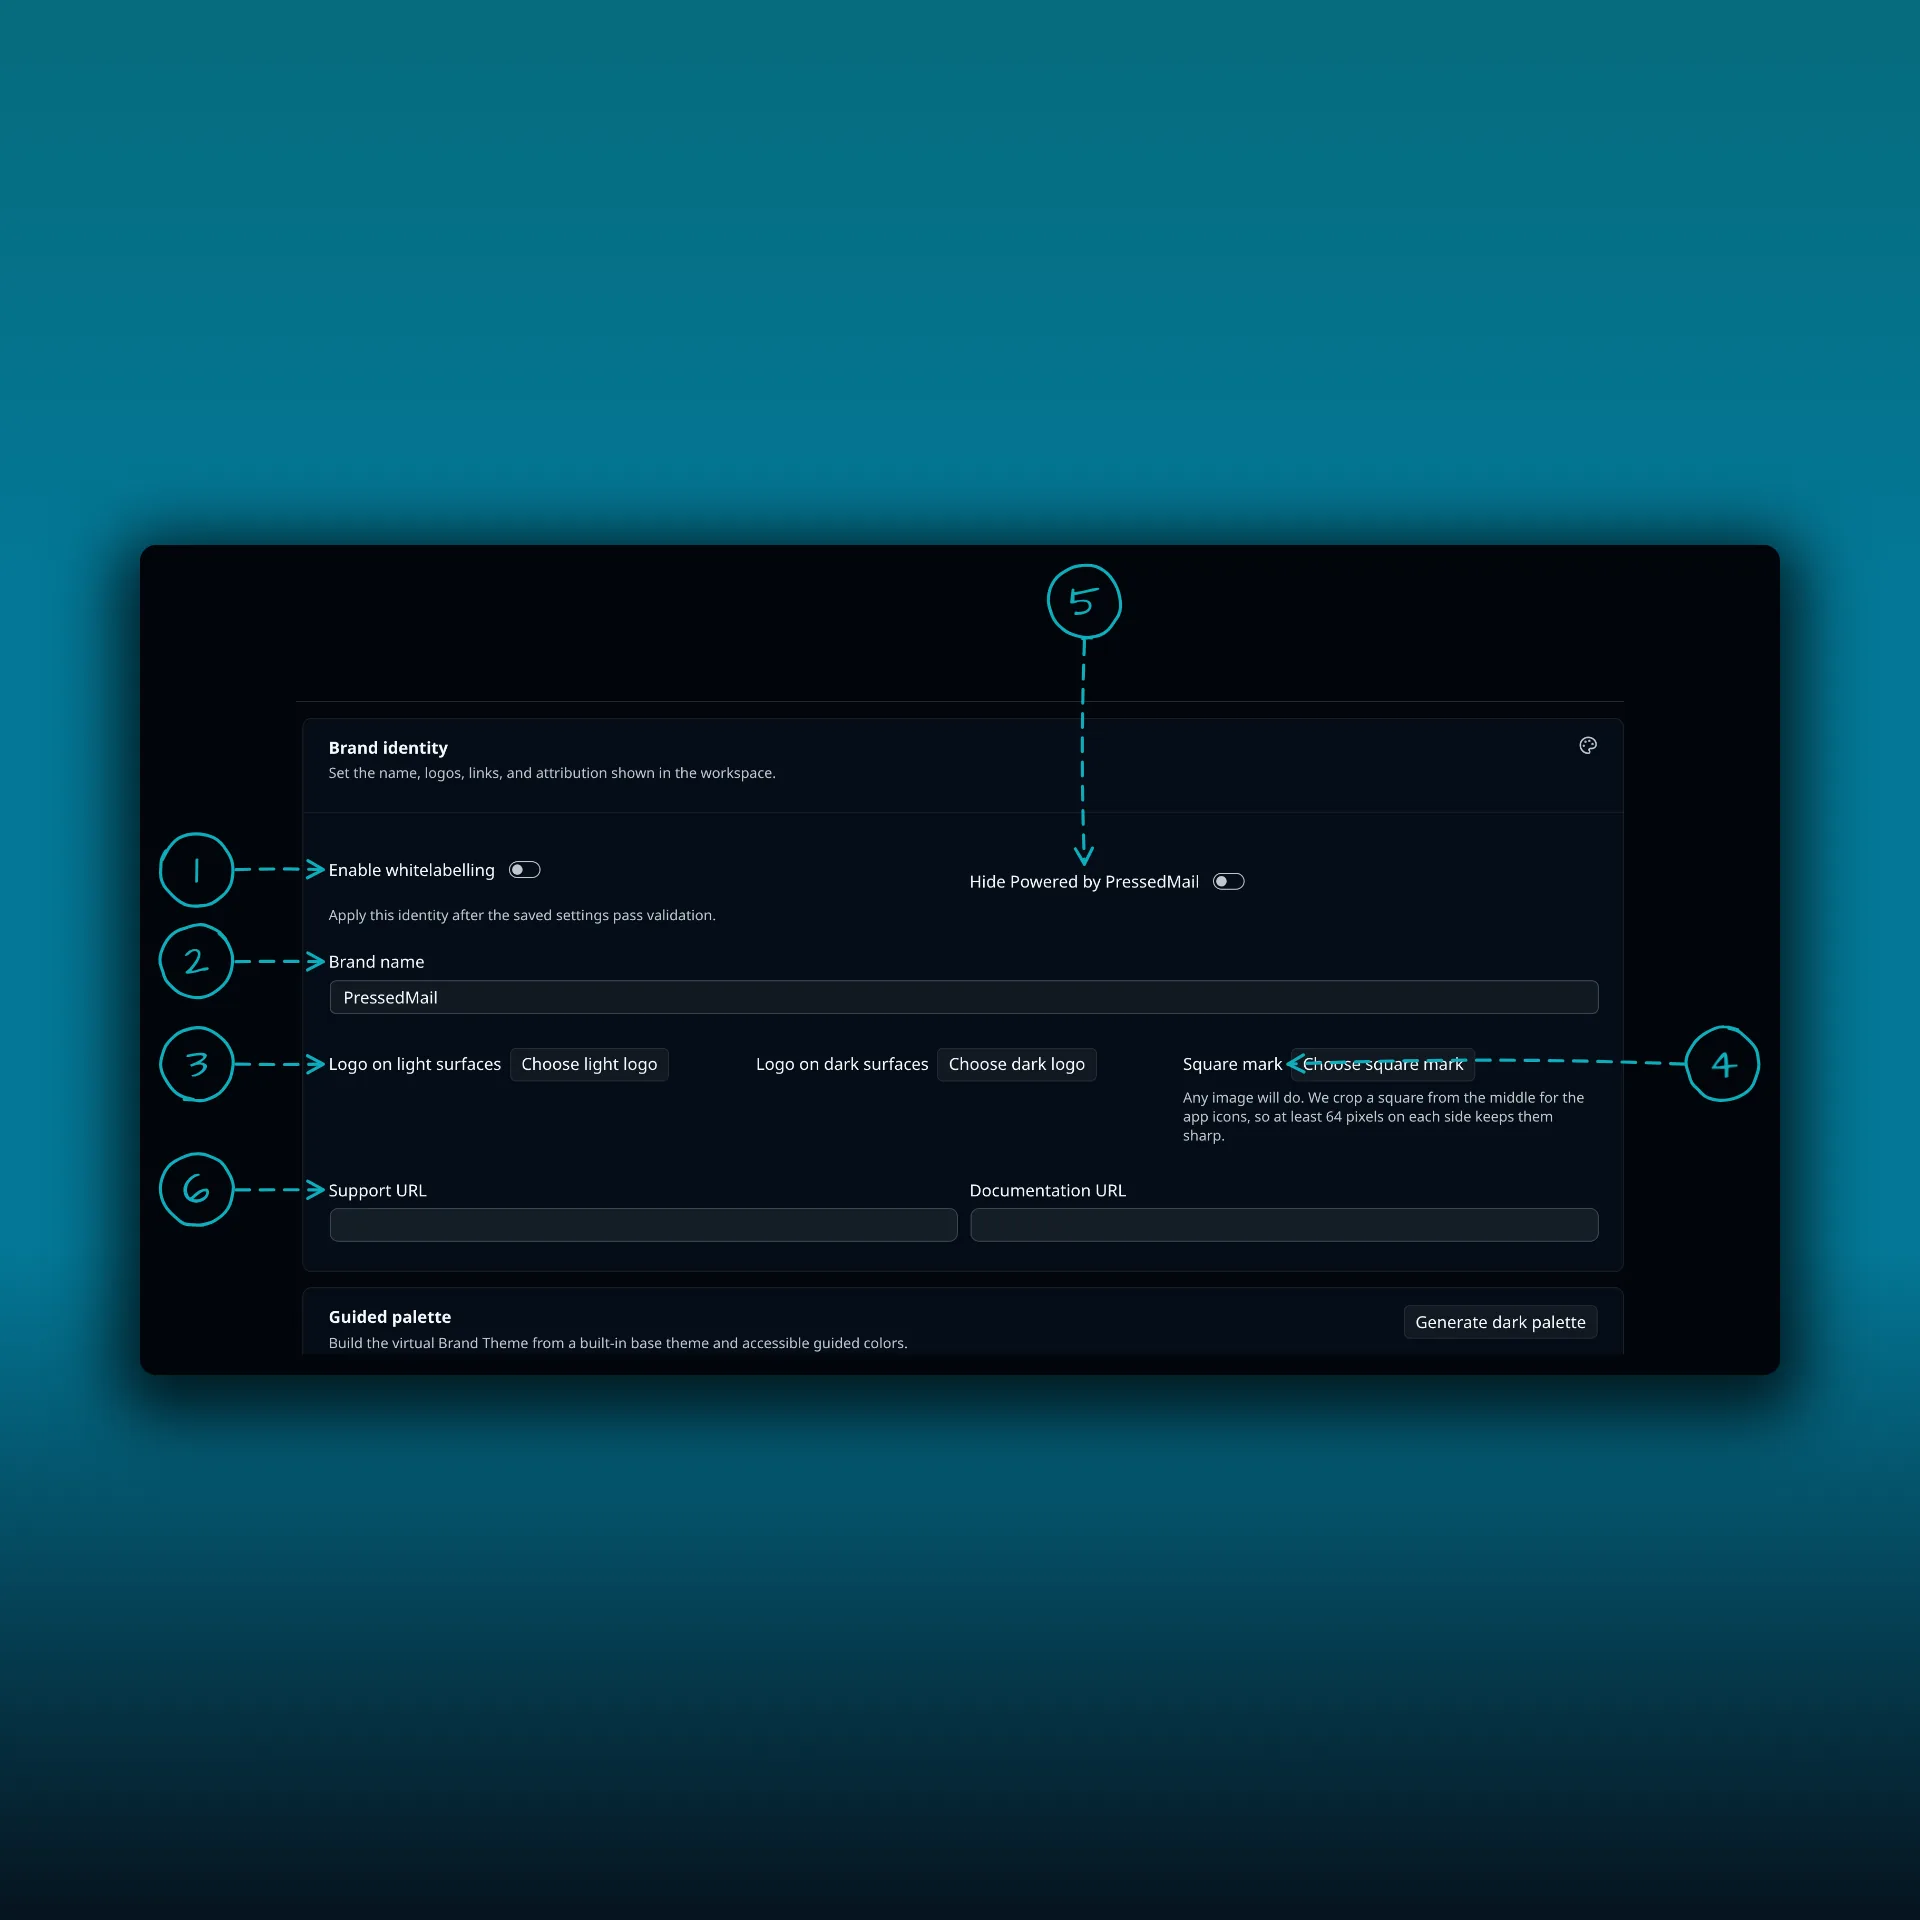
- Enable whitelabelling. The switch that applies the identity once the saved settings pass validation.
- Brand name, up to 80 characters.
- Logos for light surfaces and for dark surfaces, chosen separately so neither one has to work on both.
- The square mark.
- Hide Powered by PressedMail.
- Support URL and Documentation URL.
The brand name replaces the PressedMail entry in the WordPress admin menu, the product mark inside the workspace, and the name the installed web app uses on a phone home screen.
The square mark can be any shape. PressedMail crops a square from the middle, and each side needs at least 64 pixels or the home screen icon turns blurry. It becomes the admin menu icon, the favicon, the apple touch icon, and the app icons at 192 and 512 pixels. Images can be PNG, JPEG, WebP or GIF. SVG is rejected.
Hide Powered by PressedMail removes the attribution from the status bar of the workspace, including the wordmark and the version. The Support URL and Documentation URL point your users at your help desk and your guides instead of PressedMail’s. Both appear in the status bar and in the speed dial menu.
Set the palette
Below the identity is the guided palette. Choose a base theme, then set five colors for each mode: primary, secondary, accent, background and foreground. Add a corner radius of subtle, standard or rounded. Together these become a virtual palette called the Brand Theme.
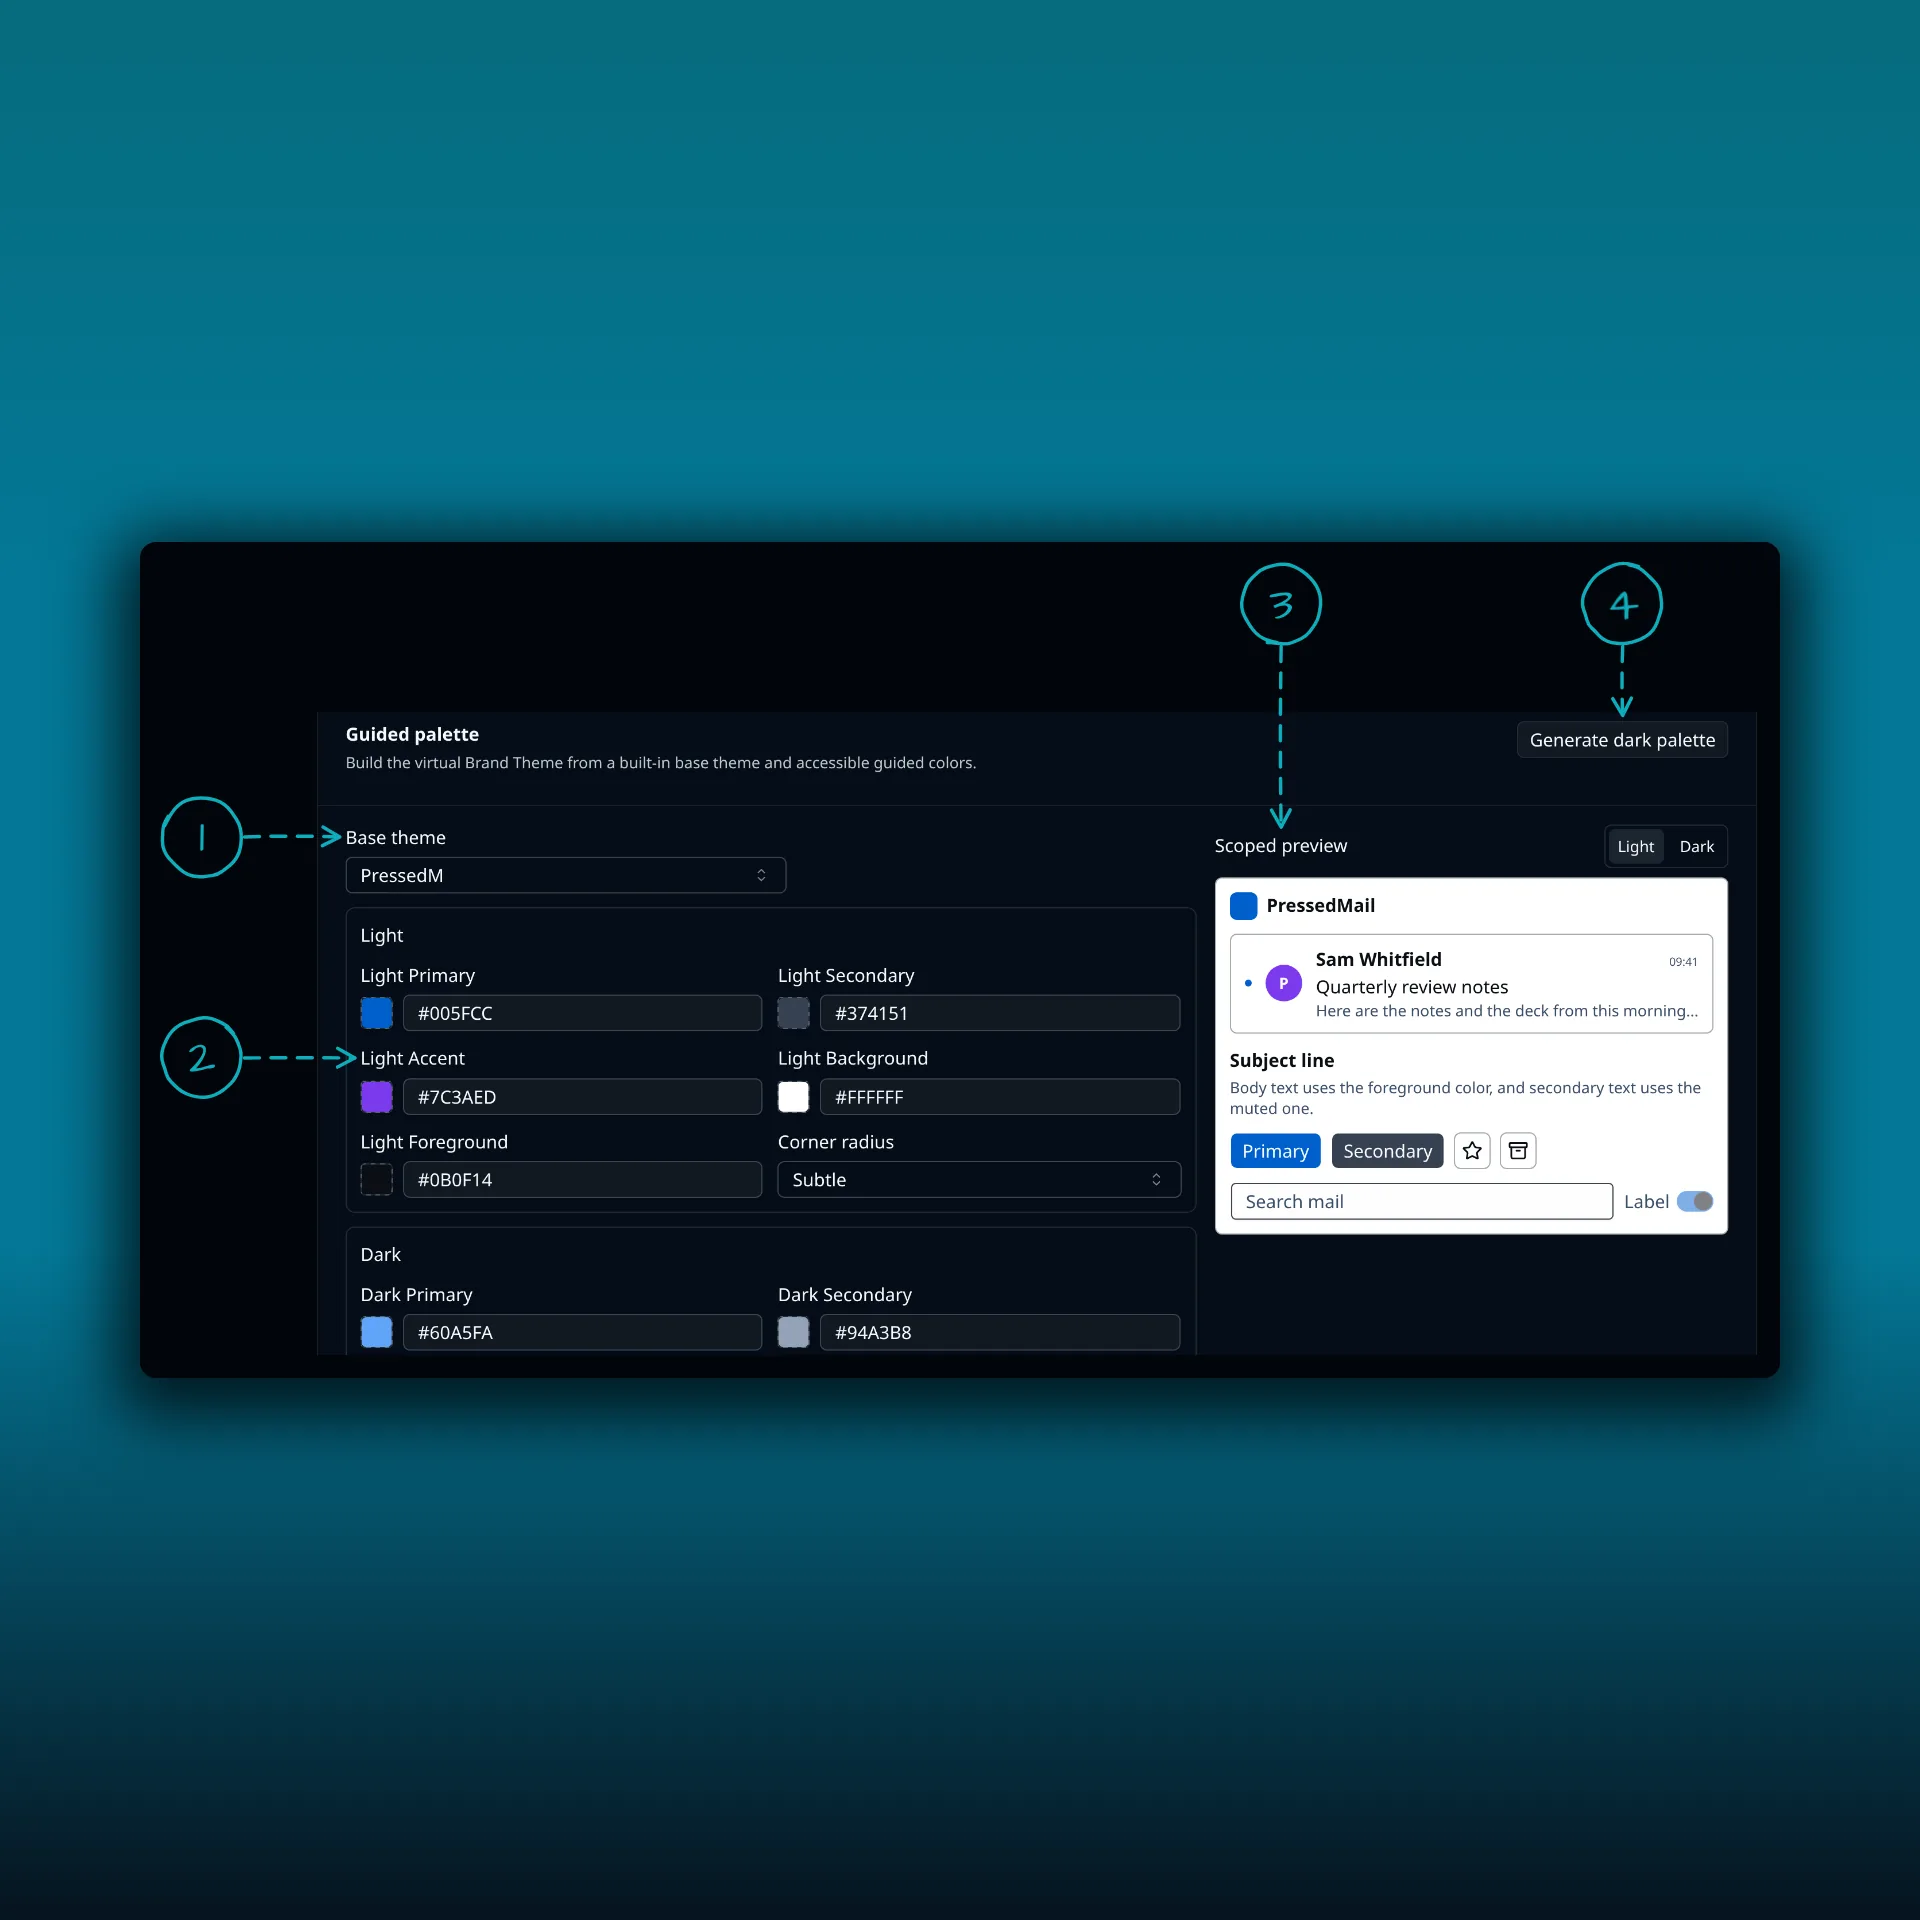
- Base theme.
- The colors for each mode, here the light ones. The corner radius sits beside them.
- The scoped preview card. Its colors stay inside that card until you save.
- Generate dark palette, which fills in a dark set of colors for you to adjust.
A palette whose foreground and background fail the WCAG AA contrast of 4.5 to 1 will not save. Adjust the color pair and try again. That check keeps a client’s brand from making the workspace hard to read.
Decide what users may change
Further down, User choices set the defaults and decide what people can switch. Set the default appearance mode and the default inbox layout. Then decide separately whether users may change the theme, the mode and the layout at all. The layout lock is enforced on the server as well, so it holds even against a hand-made request.
For what people can change when you leave it open, see the guide to personal preferences and appearance.
What white labelling does not touch
- Mail you send carries no PressedMail credit in any build. There is no footer, no link and no mailer header. The Hide Powered by PressedMail switch only affects the status bar inside the app.
- The WordPress login screen, the admin footer text and every admin page that is not PressedMail stay as they were.
- Branding is per site. Everyone using that install sees the same identity, so it is not per client inside one site.
If you run one WordPress site for each client, that is the model you want. If you share one site between clients, they all see the same brand. The sharing guide covers giving client staff access to a mailbox. The agency guide covers how to set up mailboxes for client work.
For developers
The runtime branding object reaches the workspace through the pressedmail_whitelabel_data filter. Return your own array from it and you replace the whole object without touching the stored settings. The settings read and write over the plugin’s REST route for whitelabel settings, protected by a REST nonce and the manage options capability.
If the paid features are deactivated, PressedMail backs up and clears the stored branding. The workspace then falls back to PressedMail rather than to a half-applied identity.
A short checklist for a client handover
- Turn on whitelabelling, enter the brand name and upload both logos.
- Upload a square mark, at least 64 pixels on each side. A larger one gives a sharper icon.
- Set the support and documentation links to your own.
- Pick the palette and check the preview.
- Choose the default mode and layout, and lock what you do not want changed.
- Save, reload the workspace and open it on a phone to see the home screen name and icon.
For the phone side, the post on PressedMail on your phone shows the narrow layout.
Which plan do I need?
White labelling needs Ultimate or Lifetime. The plan comparison lists what each plan includes.
Frequently asked questions
Does white labelling change the emails I send?
No. Outgoing mail carries no PressedMail credit in any build, so there is nothing to remove.
Can each client of one site have their own brand?
No. Branding is per site. Everyone using that install sees the same identity.
Why will my colors not save?
The foreground and background of a palette have to meet the WCAG AA contrast of 4.5 to 1. Adjust the pair and save again.
Can I use an SVG logo?
No. Images can be PNG, JPEG, WebP or GIF. SVG is rejected.
What happens if I downgrade?
If the paid features are deactivated, PressedMail backs up and clears the stored branding and falls back to the default name.
Manage your email inside WordPress
PressedMail Free adds an email client directly to your WordPress dashboard. Connect a compatible IMAP/SMTP mailbox, read and send mail, organize messages, and configure WordPress SMTP.