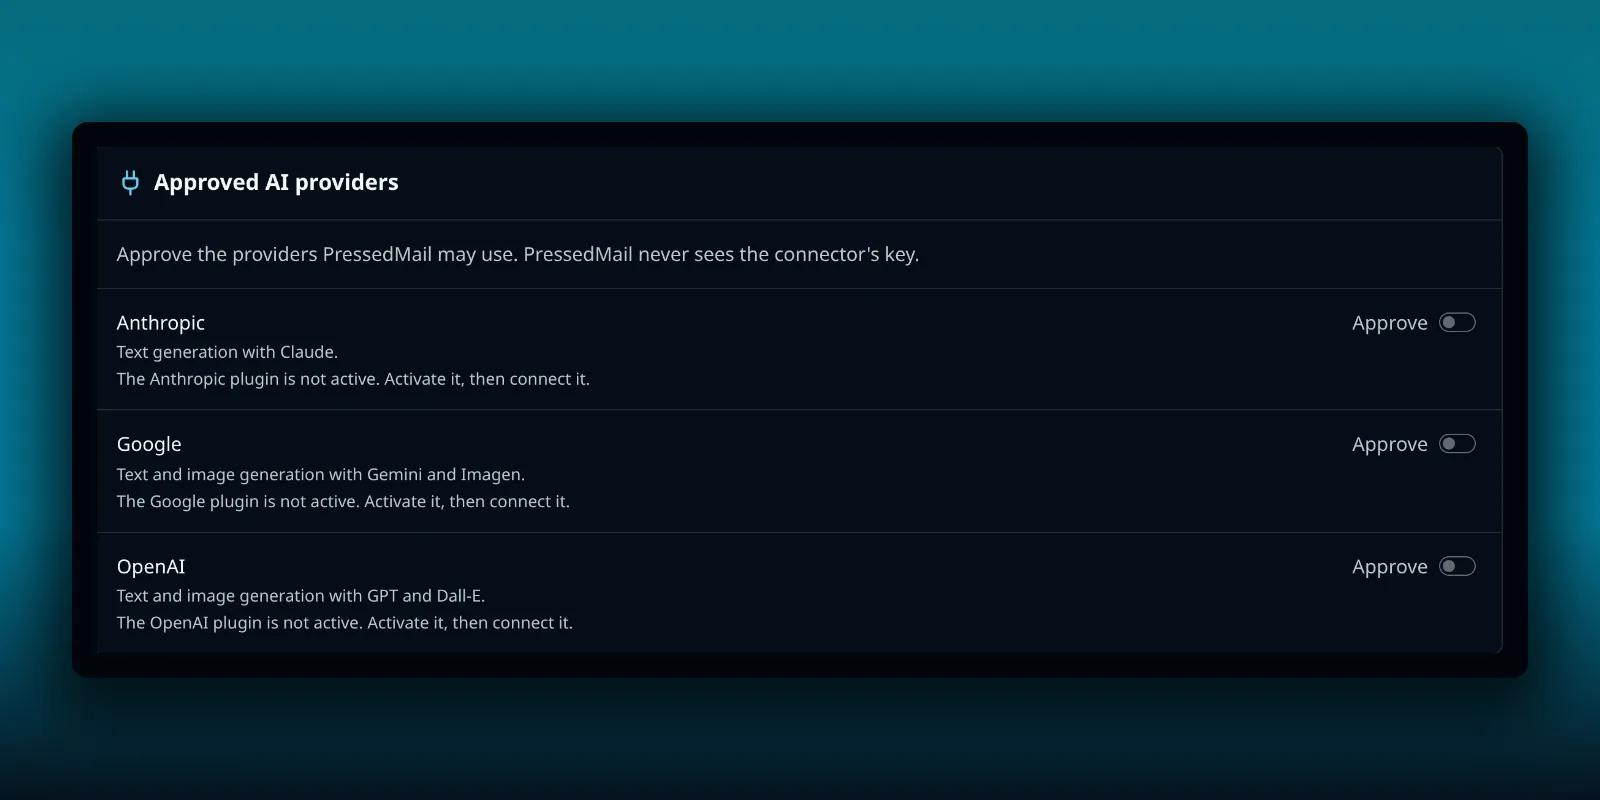
If you run PressedMail’s AI tools on your own AI provider, WordPress 7.0 changes where the key lives. You no longer paste it into PressedMail. You connect the provider in WordPress, approve it in PressedMail, and pick a model for each tool.
PressedMail stores two things: which connector you approved and which model each tool uses. It never stores the connector’s key. This guide is for PressedMail Pro and covers the setup, the screen, and what to do when something is blocked.
If you use PressedMail AI instead, with its own credits, none of this applies. Those tools need no provider setup. The credits guide explains how they work.
What a connector is
WordPress 7.0 adds a Connectors screen under Settings. A connector is a link between WordPress and an AI provider, added by a small provider plugin. WordPress holds the API key, and any plugin that wants to use the provider asks WordPress for it.
The WordPress AI team’s AI plugin page describes the same pattern. You install a connector plugin for Anthropic, Google or OpenAI, then add your API key in Settings, then Connectors. Your provider bills you for every request.
Set it up
The order matters, because each step makes the next one possible.
- In WordPress, install and activate the provider’s plugin, such as AI Provider for OpenAI.
- Open Settings, then Connectors in WordPress, and connect the provider with your API key.
- In PressedMail, open Settings, then AI Tools. In the Approved AI providers card, switch on Approve for that provider.
- In the AI provider card, open the Provider menu and pick the connector.
- Switch on Enable AI features, then pick a model for each tool you want.
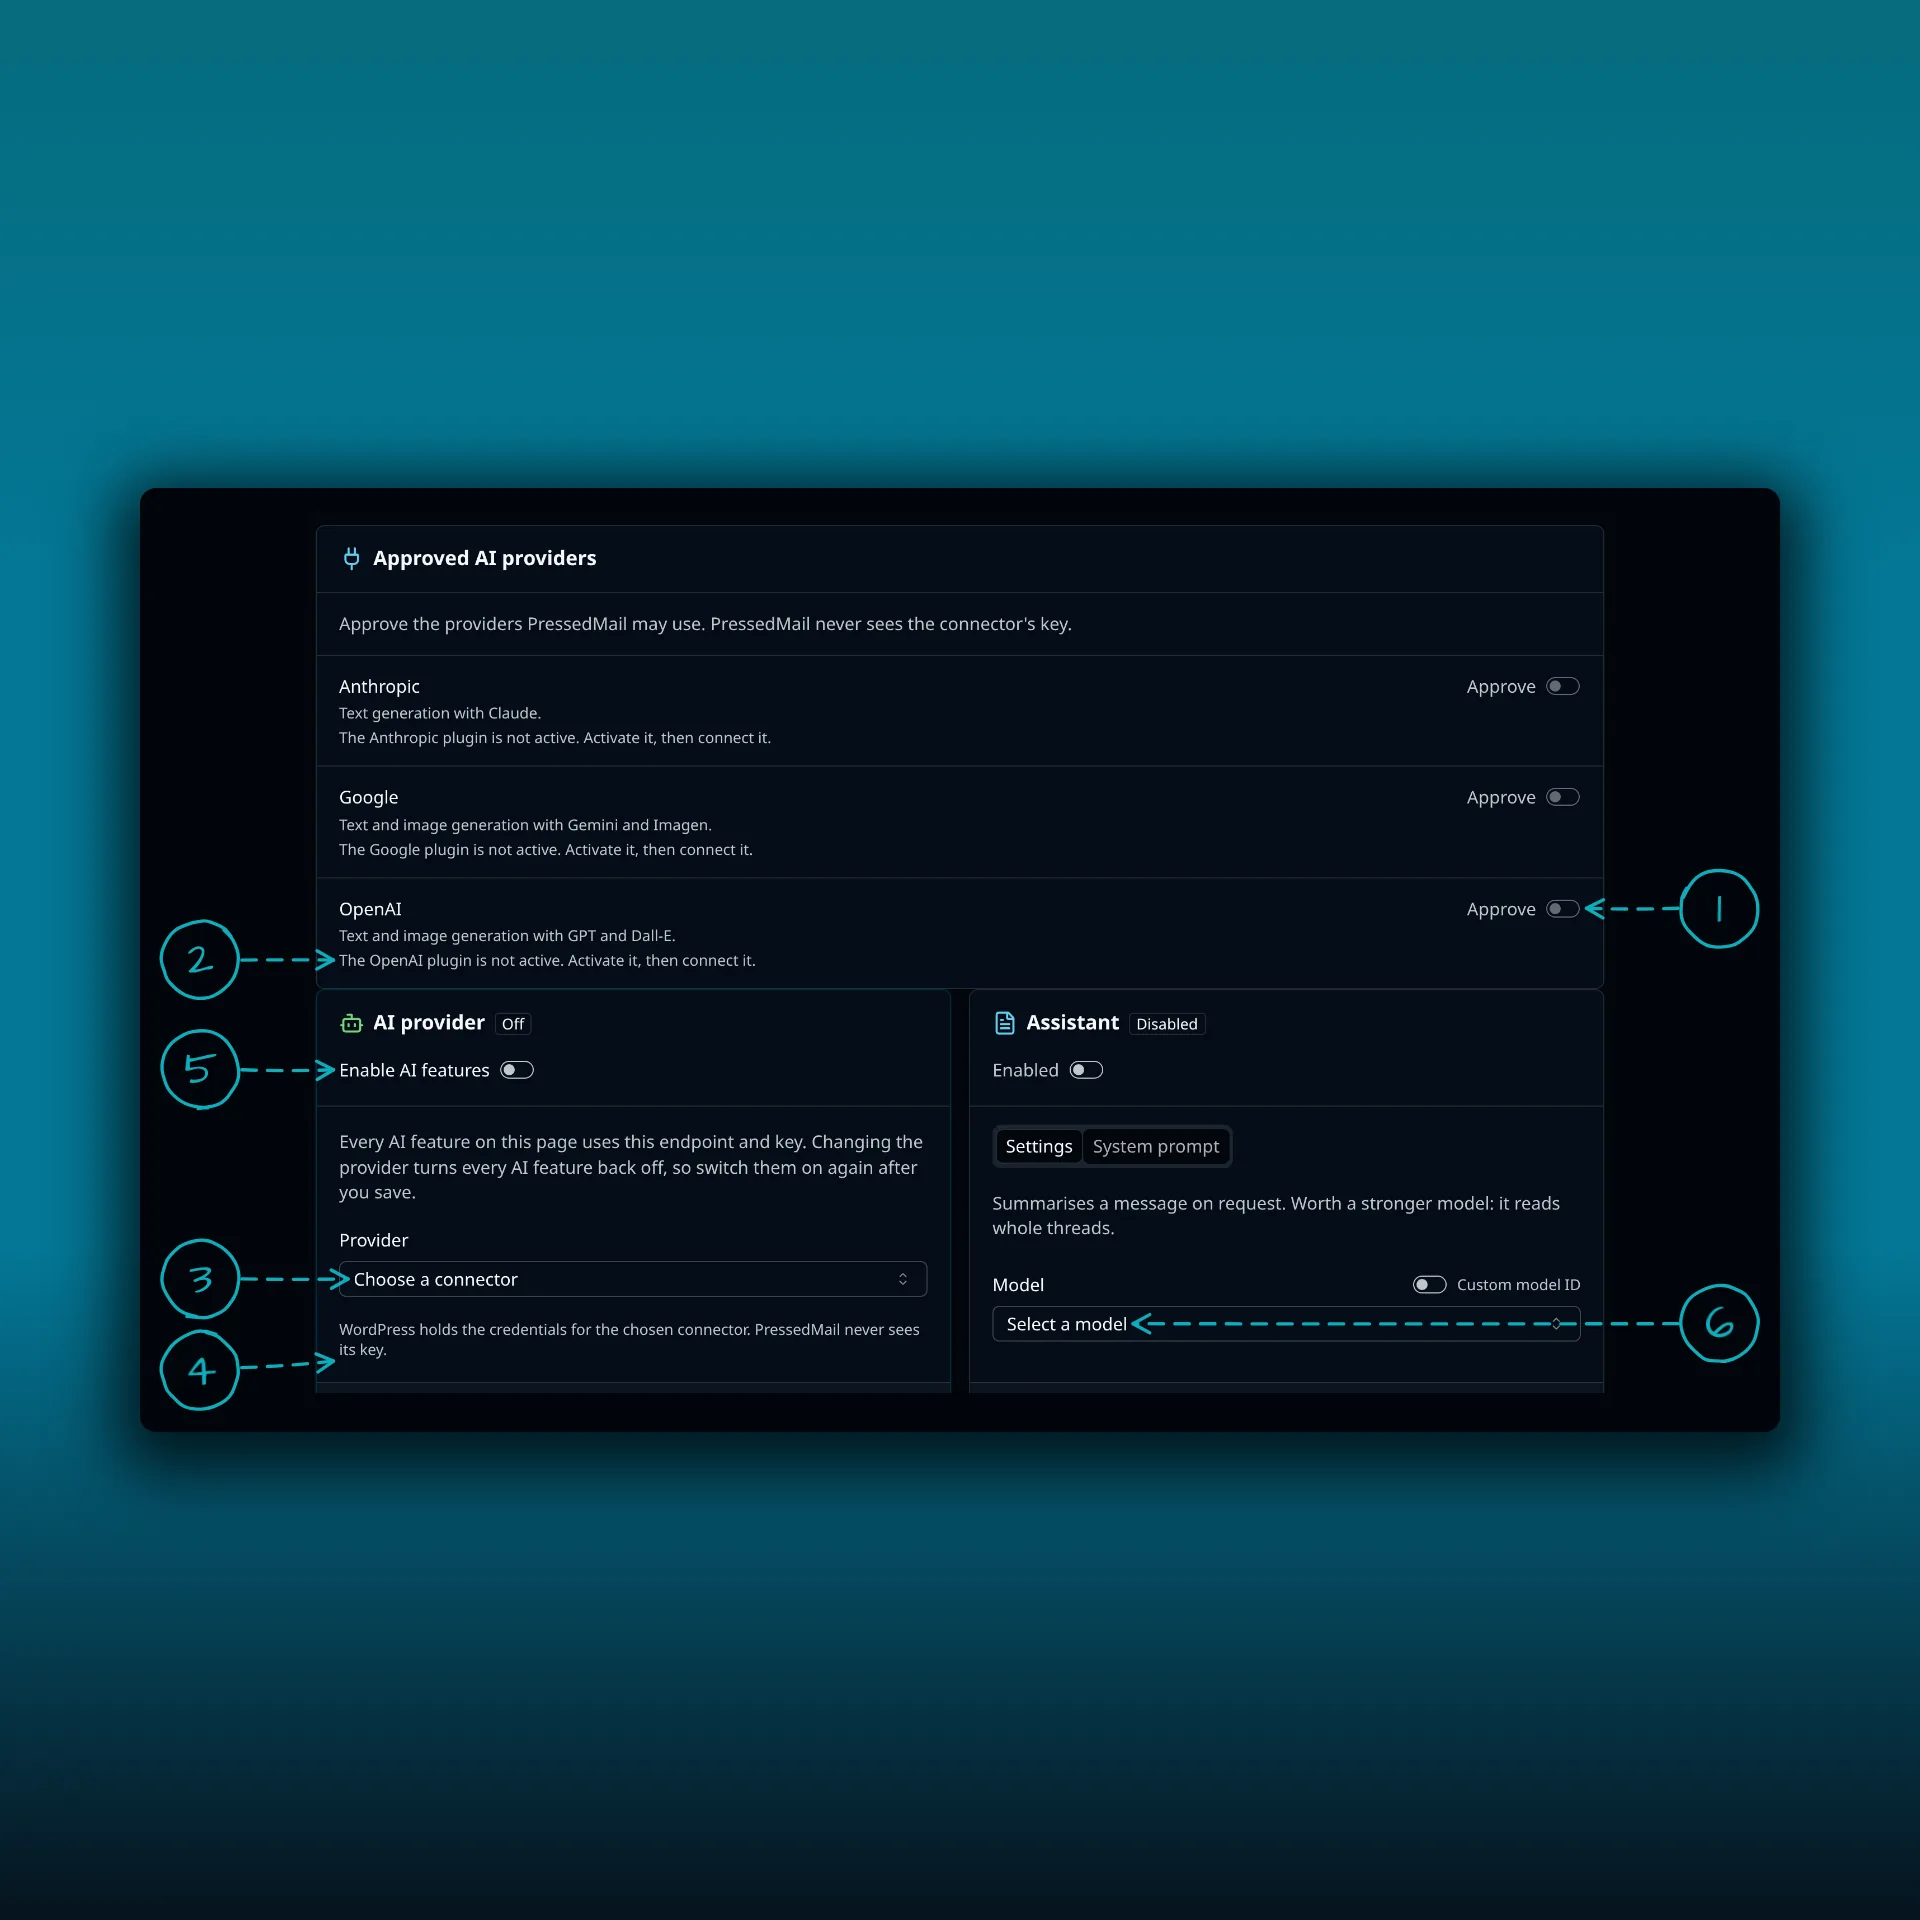
- Approve. One switch per provider. PressedMail only uses providers you approve here.
- The status line under a provider. It says what is missing, such as the provider plugin not being active.
- Provider. Choose a connector.
- The note under it. WordPress holds the credentials, and PressedMail never sees the key.
- Enable AI features. This switch turns the whole set on.
- Model, on the Assistant card. Every tool has its own.
The screenshot is from a demo site where no provider plugin is active, so every provider says so. On your site a connected provider says Connected and approved.
What the status line tells you
Each provider shows one of these.
- The provider’s plugin is not active. Activate it, then connect it.
- Not connected yet. The line links to Settings, then Connectors.
- Connected. Approve it to let PressedMail use it.
- Connected and approved.
If you switch off an approval while a tool still uses that provider, PressedMail says which tools still point at it. Those tools stop working until you choose another provider.
One provider, several tools
The AI provider card applies to every AI tool on the page. Changing the provider turns every AI feature back off, so switch them on again after you save.
Below it, each tool has its own card: Assistant, Composer, Auto-tagger, Phishing detection and Spam checks. Each has an Enabled switch and a Model menu. You can leave a model on its default, or pick one the connector offers, or turn on Custom model ID to type your own. Spam checks use the model chosen on the Phishing detection card.
Phishing detection and Spam checks sit further down the same page.
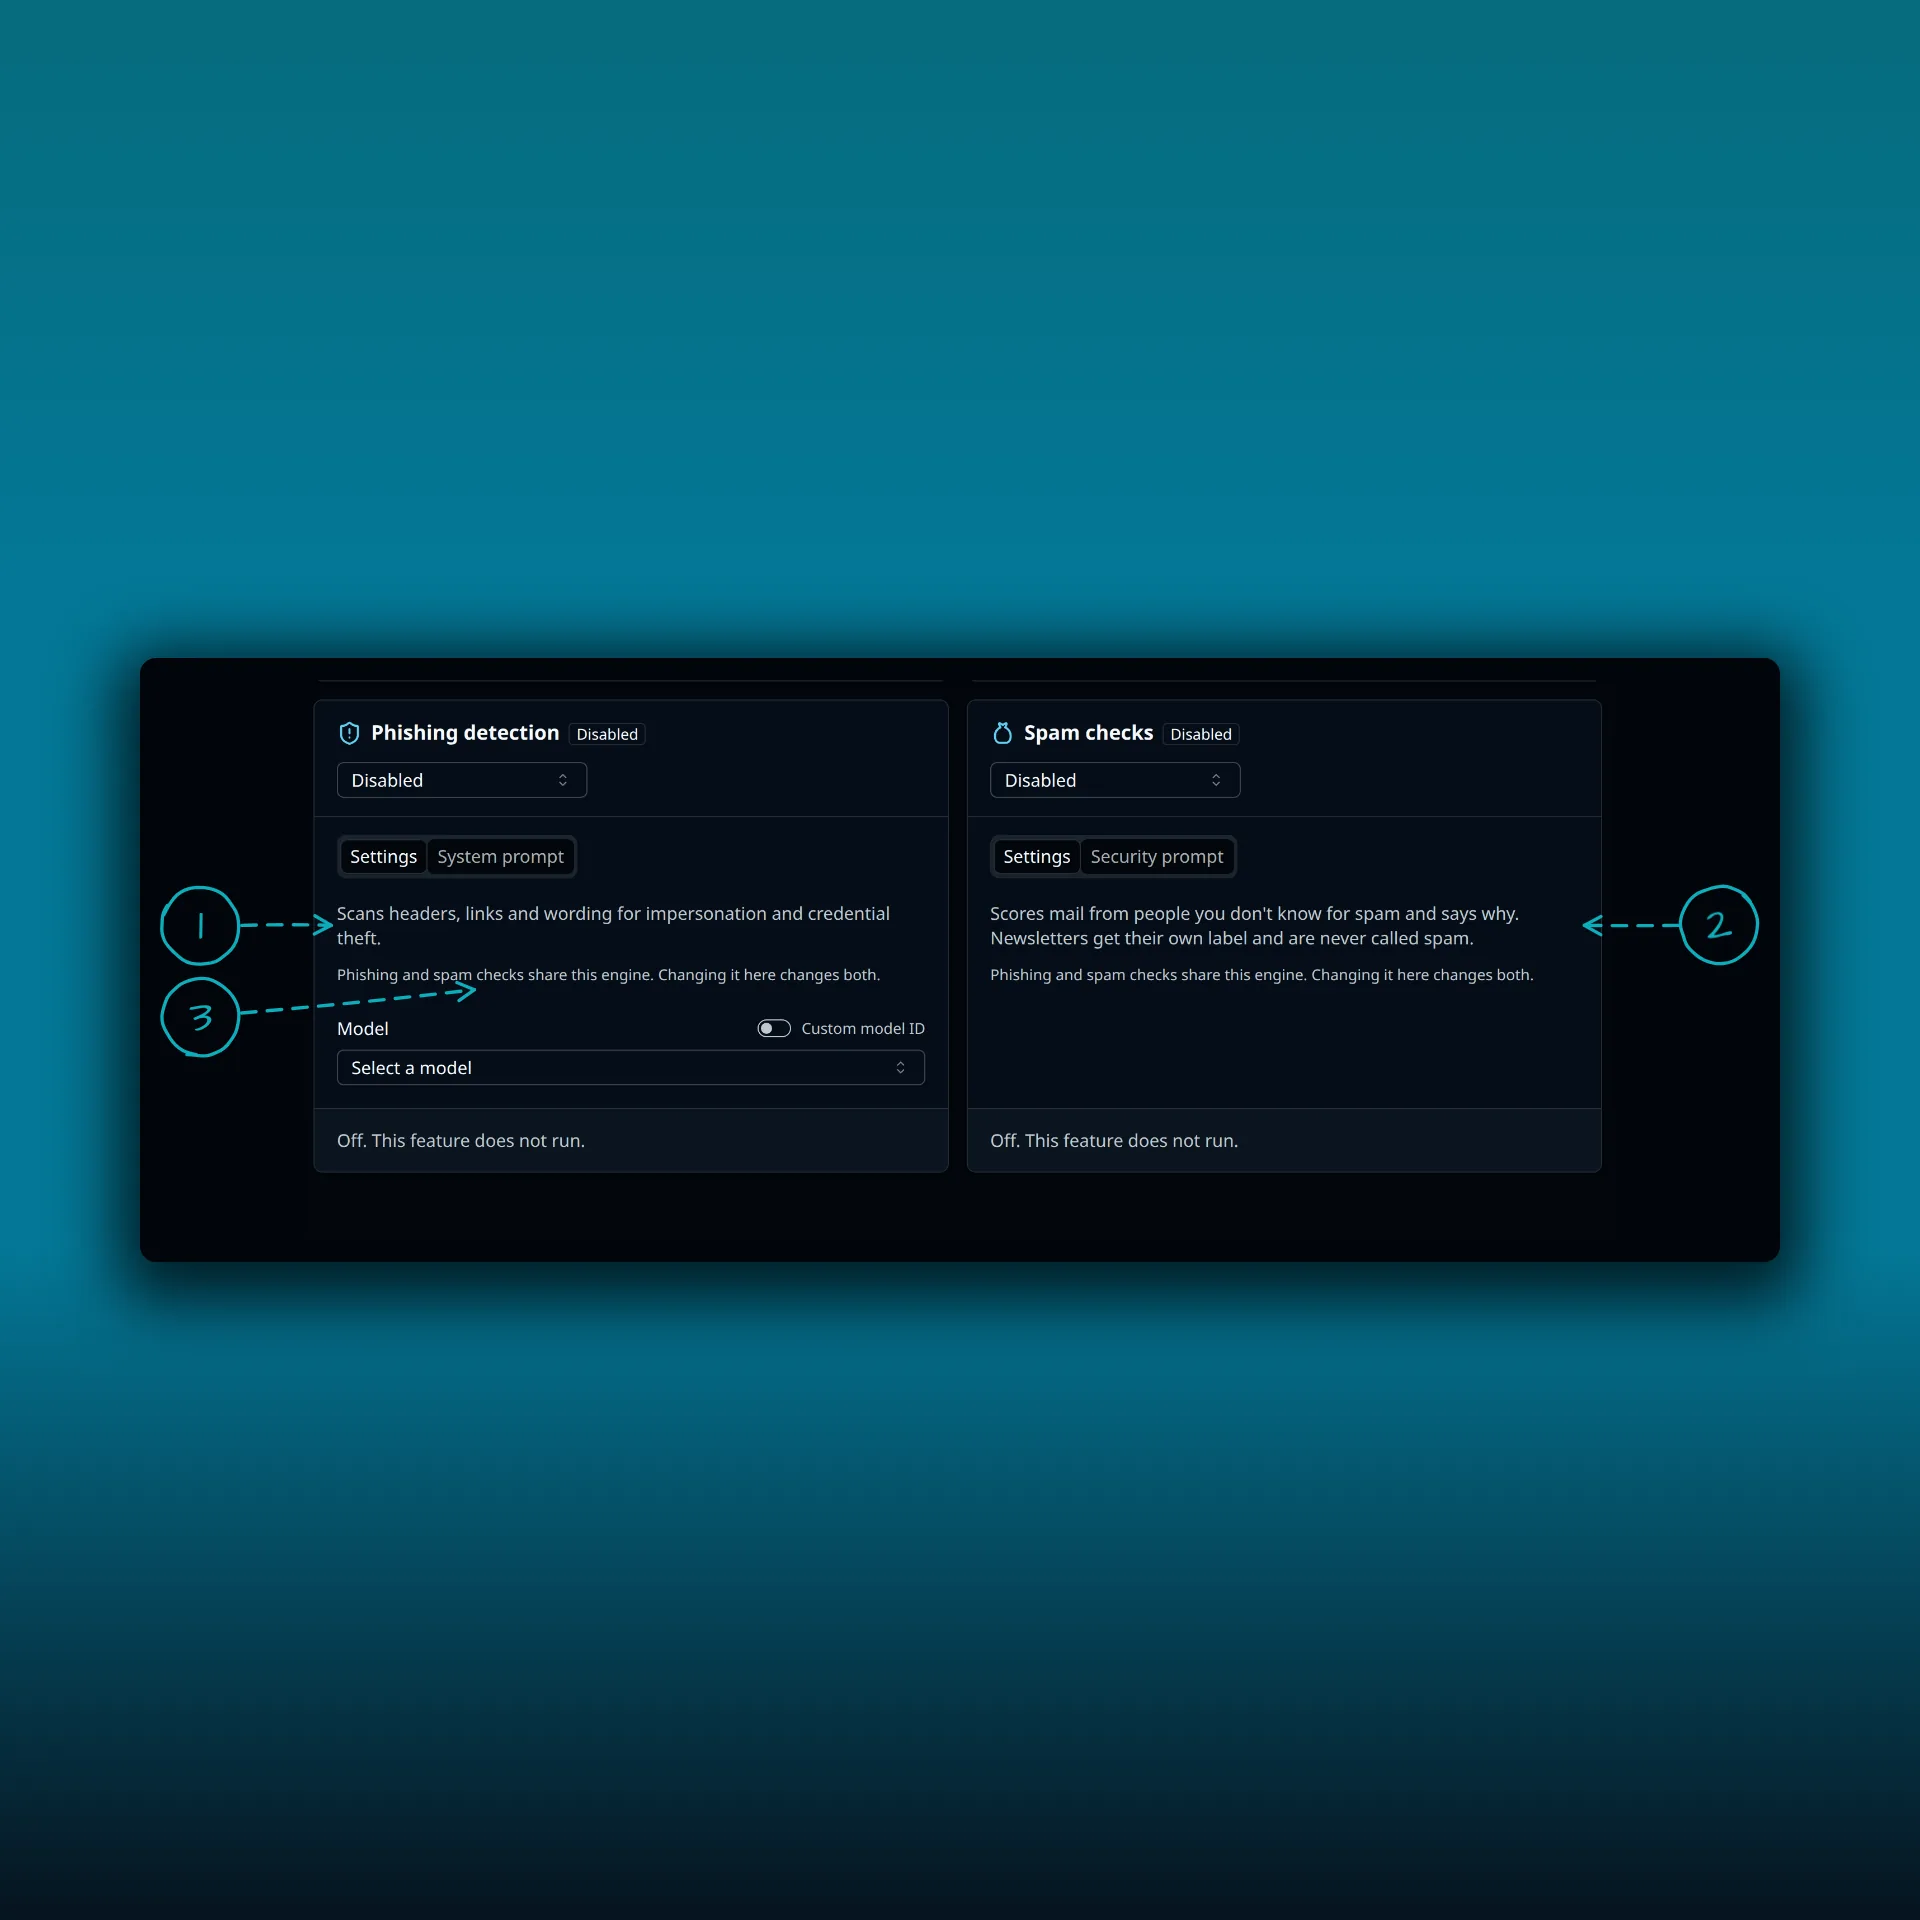
- The Phishing detection card.
- The Spam checks card.
- The note that phishing and spam checks share one engine, so changing it on one card changes both.
Pick models to suit the job. The Assistant reads whole threads, so a stronger model helps. The Auto-tagger runs on every message, so a small, fast model is usually enough. The auto-tagging guide and the spam and phishing guide say what each tool does.
If WordPress blocks a request
The WordPress AI plugin has an opt-in experiment called Connector Approvals. When it is on, it blocks AI requests from any plugin until you approve that plugin, and PressedMail is one of them. A tool that fails with WordPress blocked this request has hit it. PressedMail names the place to fix it: Tools, then Connector Approvals in WordPress. Approve PressedMail there and try again. The block applies when the provider’s key is saved in WordPress Connectors.
If you already had a key saved
On WordPress 7.0 and later, nothing breaks. AI keeps running on the key you saved earlier, and the AI provider card tells you so. When you want to move:
- Set the provider up in Settings, then Connectors.
- Approve it on the AI Tools page.
- Choose it on the provider card.
The API Key and Base URL fields are gone on these WordPress versions, because the key now lives in WordPress. On WordPress older than 7.0, the card says the site needs the Connectors screen that 7.0 adds, and the provider fields still work.
What gets sent
AI tools send data to your external provider when you enable them. The card says so under the provider menu. Review your provider’s terms before you turn on a tool that reads whole messages. The guide to where PressedMail keeps your mail covers what stays on your own site.
Common questions
Does PressedMail see my API key?
No. WordPress holds it, and PressedMail stores only the approval and the model choice.
Do I need WordPress 7.0?
For connectors, yes. On older versions the provider fields still work.
Is this part of Free?
No. AI tools are part of the paid builds. The plan guide lists what each plan has.
Why did all my AI tools switch off?
Changing the provider turns every AI feature off. Switch them back on after you save.
Who pays for the requests?
On your own provider, your provider bills you. PressedMail AI uses credits instead.
Manage your email inside WordPress
PressedMail Free adds an email client directly to your WordPress dashboard. Connect a compatible IMAP/SMTP mailbox, read and send mail, organize messages, and configure WordPress SMTP.