

Install PressedMail
Install Free or a paid build, check the site requirements, and open your first mailbox.
PressedMail adds an email client to your WordPress dashboard. Your existing provider still hosts the mailbox. PressedMail connects over IMAP to read mail and SMTP to send it, and stores its local data in your WordPress database.
Start with Free to read, send, and organize mail. Paid plans add the combined inbox, contacts, calendar, AI tools, and scheduling. You can follow the same connection guides in either edition.
Check the site first
You need WordPress 6.6 or newer, PHP 8.2 or newer, HTTPS, and permission to install plugins. The WordPress server must be able to reach your provider's IMAP and SMTP servers. Paid licensing also needs outbound HTTPS to curb.software.
The bundled Webklex driver handles mailbox connections. You do not need the native PHP IMAP extension. If your host flags that extension as missing, see Mailbox connections before changing the server.
Install Free
- Open Plugins > Add Plugin in WordPress.
- Search for PressedMail and confirm the plugin is the PressedMail listing on WordPress.org.
- Select Install Now, then Activate.
- Open PressedMail in the WordPress admin menu.
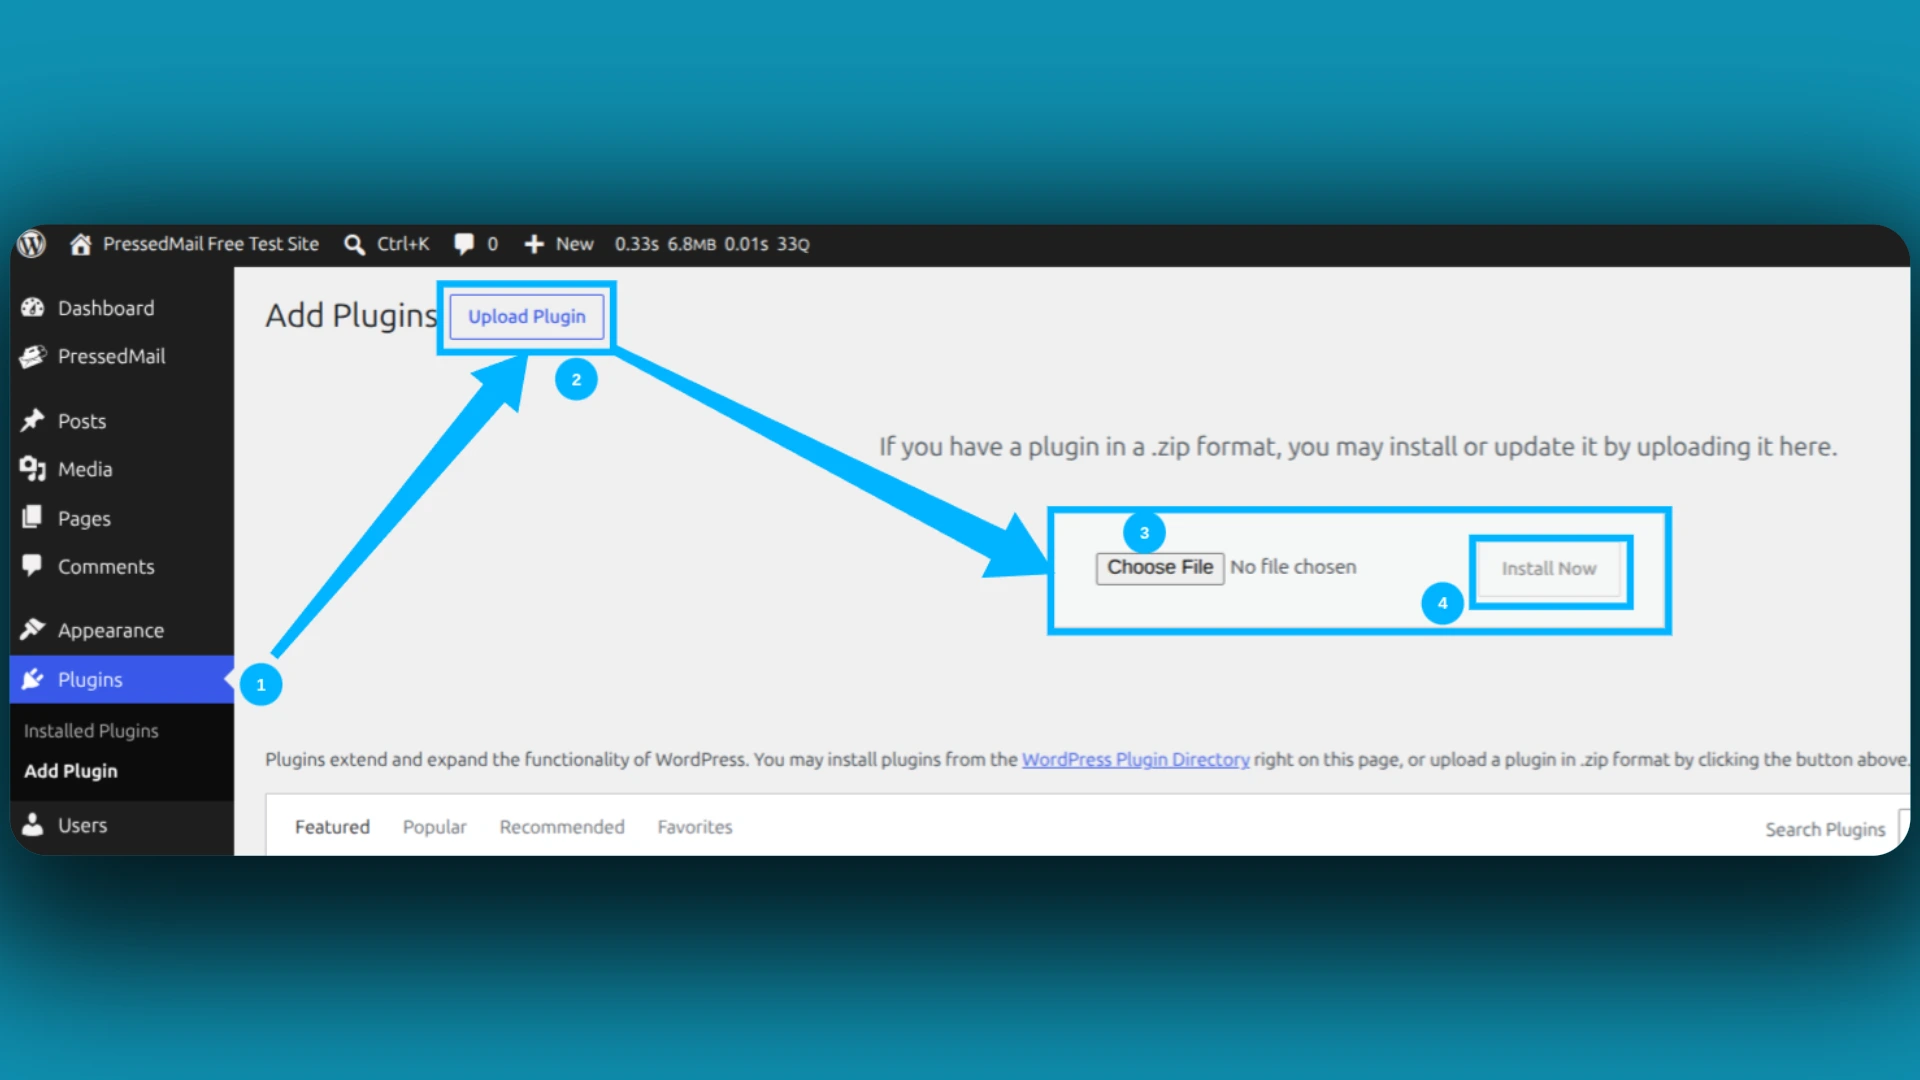
You can also download the Free ZIP from the directory and use Upload Plugin.
Install a paid build
- Sign in to your PressedMail account and download the Pro ZIP.
- Open Plugins > Add Plugin > Upload Plugin.
- Choose the ZIP, select Install Now, then activate the plugin.
- If you are replacing an existing installation, use WordPress's replacement prompt. Keep a site backup before changing editions.
- Follow Activate and manage a license. Free does not need a paid license.
Open the first mailbox
Continue with Connect your first mailbox. After saving the connection, wait for the inbox to sync, send a short test message to an address you control, and reply from that address. Confirm both directions work.
Connecting a mailbox does not automatically reroute password resets or form notifications. Those use the separate WordPress SMTP setup.
If installation or activation fails, keep the error text and use Installation, licensing, and updates. Do not delete plugin data to retry an installation.